
Step-by-Step Guide to Connecting Your Webstore with Replyco
Access Rights Needed: Main => Admin (View & Edit)
To start receiving customer messages and order information from your BigCommerce store(s), you'll need to connect your Replyco account.
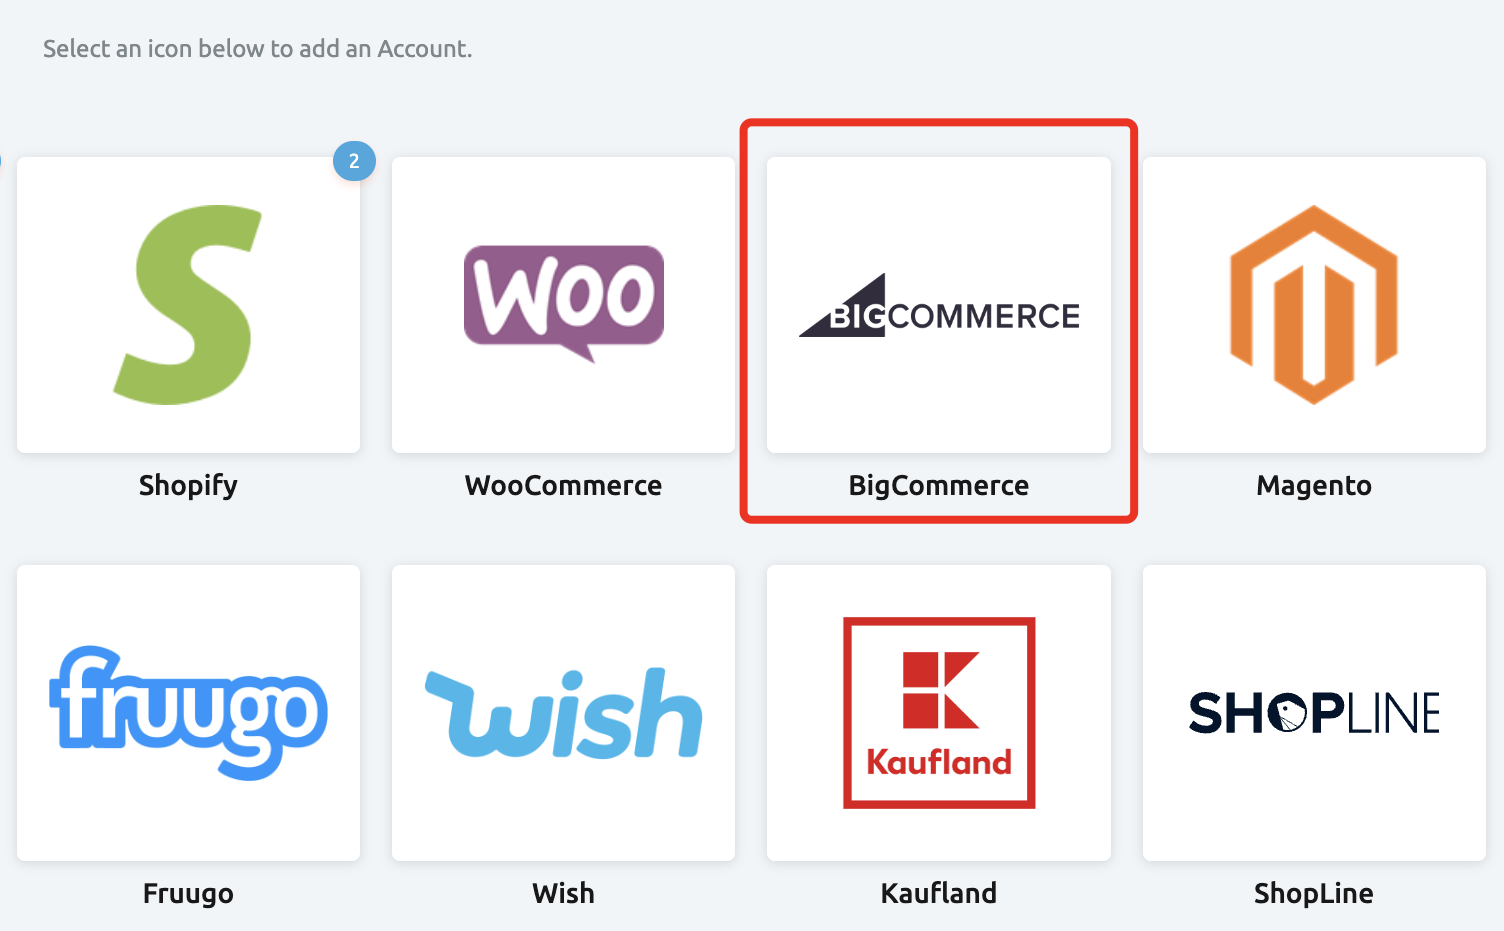
Click + Add Account at the top-right of the app.

Select BigCommerce from the list of integration options.
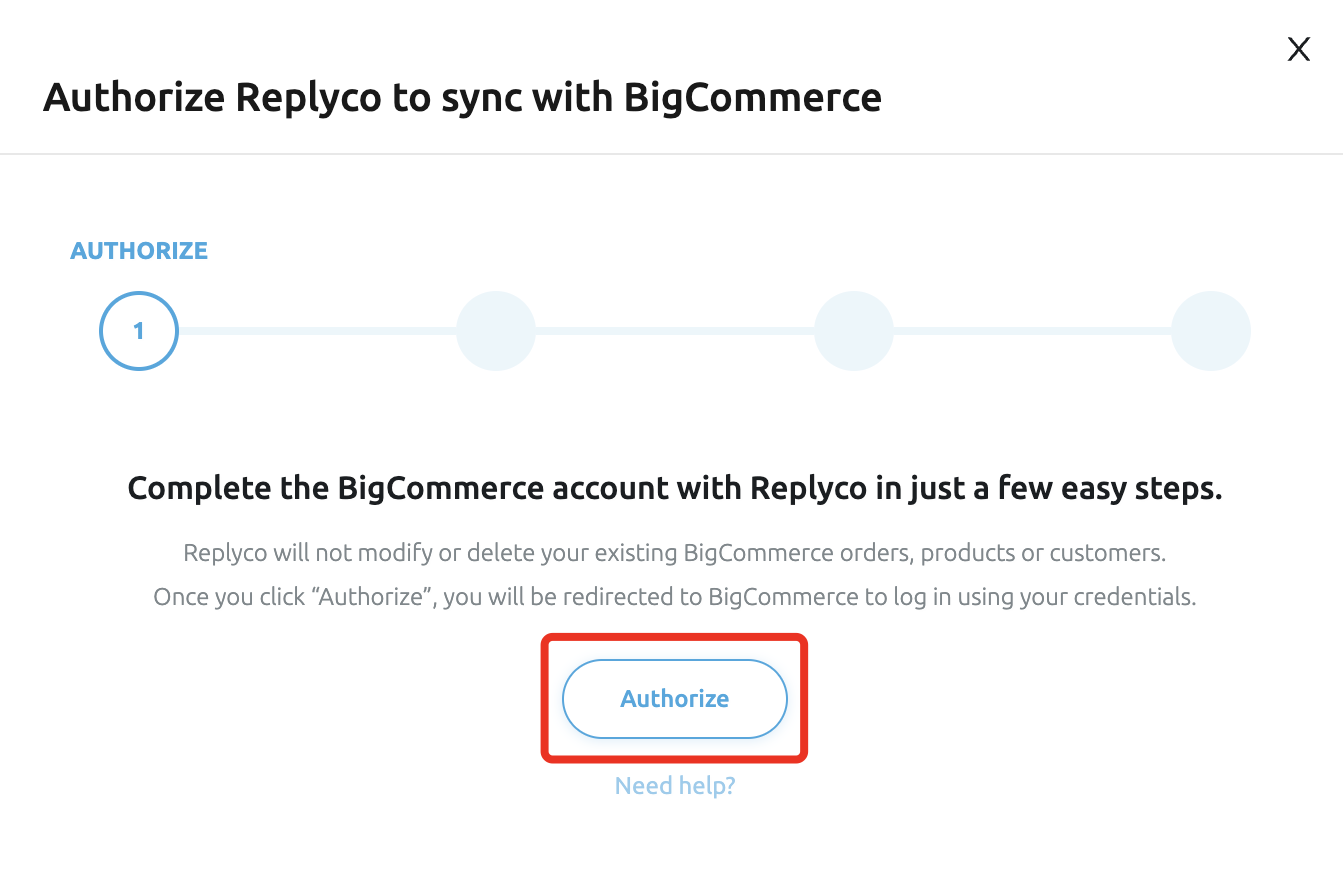
Step 1: Authorise
Click the Authorize button to begin the integration process.
Step 2: Information Setup
You’ll be switching between BigCommerce and Replyco to enter the required information.
- Enter the Account Name.
- Skip down and enter the Display Email associated with your BigCommerce account.
 Next, log in to your BigCommerce store in a new tab.
Go to Advanced Settings > API Accounts.
- Click Create API.
- In the Name field, enter Replyco.
- Set Content, Customers, Orders, Order Transactions, and Products to "Read Only".


Copy the API Path link from BigCommerce and paste it into the API Path field in Replyco.

Return to BigCommerce, click Save, and copy the Access Token and Client ID into Replyco.


-
Return back to BigCommerce and click Done. You should now see the Replyco API account appear in BigCommerce.


Return to Replyco and click Finish to complete the setup.

Step 4: Set Up Correspondence
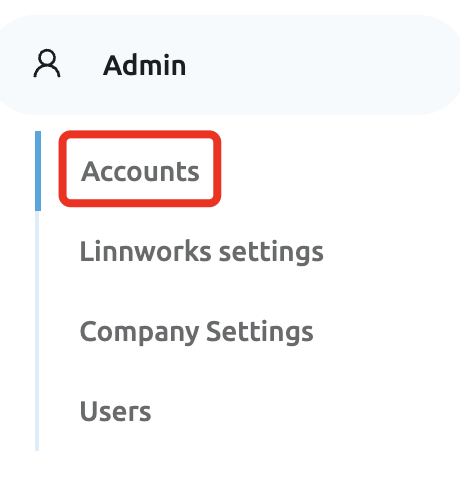
Go to the Admin > Accounts page and click on the newly set up BigCommerce integration.
- Scroll down to find the Replyco-generated email address.

- Set up email forwarding to this address or use your own Custom SMTP Configuration.
All Done!
Your BigCommerce account is now connected, and you should see the Replyco API account listed in BigCommerce.
VIEW / EDIT
To view existing integrations, navigate to Admin > Integrations.
The list will show the Source, Synchronisation Status, Account, Name, and the dates of the last messages and orders synced.

- 🟢 Green status means the integration is correctly configured.
- 🔴 Red status means the integration is not correctly configured.