Integration Capabilities:
- Receiving Incoming Messages
- Sending Outgoing Messages
Access Rights Needed:
- Main > Admin (View)
- Main > Admin (Edit)
Replyco makes it super easy to gather messages from your email account, bringing all of your communications together in one convenient place. This is especially helpful for role-based accounts (like info@) that need to be accessed by multiple users.
Integration Process
To begin the integration process, locate and click on the "+ Add Integration" button situated at the top right corner of the application.
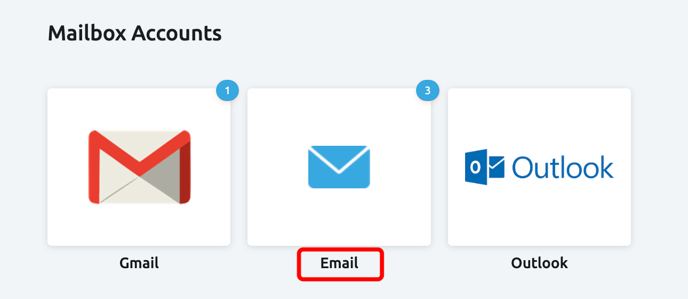
Next, from the available integration options, select "Email" to proceed.

Next, please complete all the necessary fields.
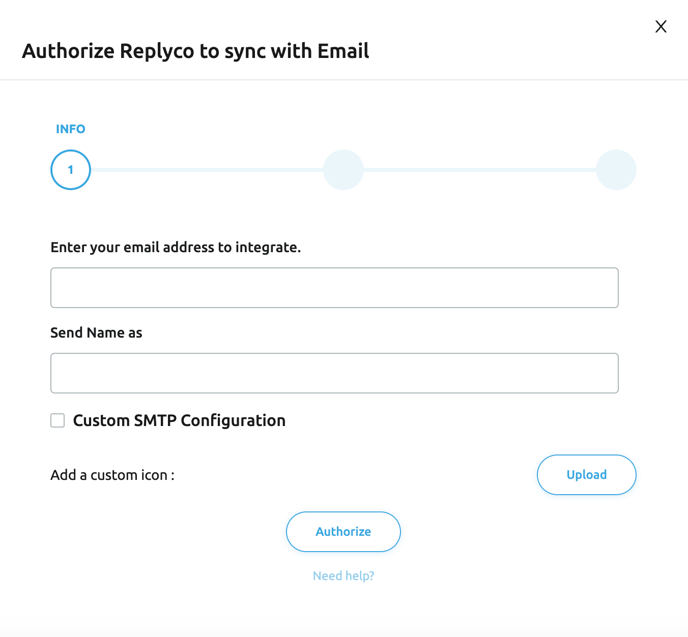
Fields Description:
Enter your email address to integrate - please provide the email address of the mailbox you wish to integrate into Replyco.
Send Name as - the name that your recipients will see when you send outgoing messages through Replyco. For reference, here's an example of how it appears in Gmail:


Add a custom icon - this feature enables you to upload a custom icon, allowing for a personalized branding experience instead of using a standard icon:

Once you have filled out all the required fields, the next step is to select your preferred method for integrating your mailbox into Replyco:
-
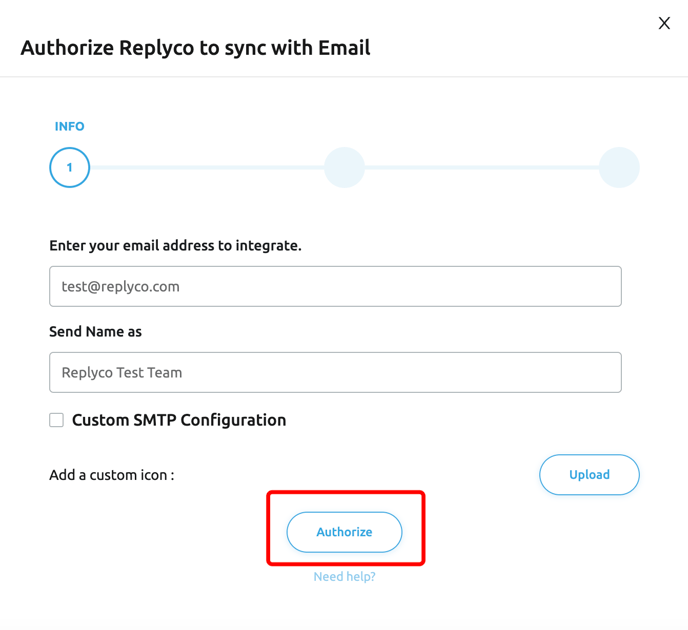
Forwarding. You configure your current mailbox to forward messages to the Replyco email address we provide. Everything that is being sent to this Replyco-generated email address, will be displayed in Replyco. If you choose this option, please ensure that the Custom SMTP Configuration option is disabled.
- Custom Settings. This method establishes a direct connection to your email server using IMAP or POP to receive emails, and SMTP to send your replies through Replyco, ensuring seamless communication. If you choose this option, please ensure that the Custom SMTP Configuration option is enabled.
Integrating Your Mailbox via Forwarding
After you have completed all the necessary fields, please click the Authorize button to continue with the integration process.
Upon clicking the button, you will receive a unique Replyco generic email address. Be sure to copy this address for future use.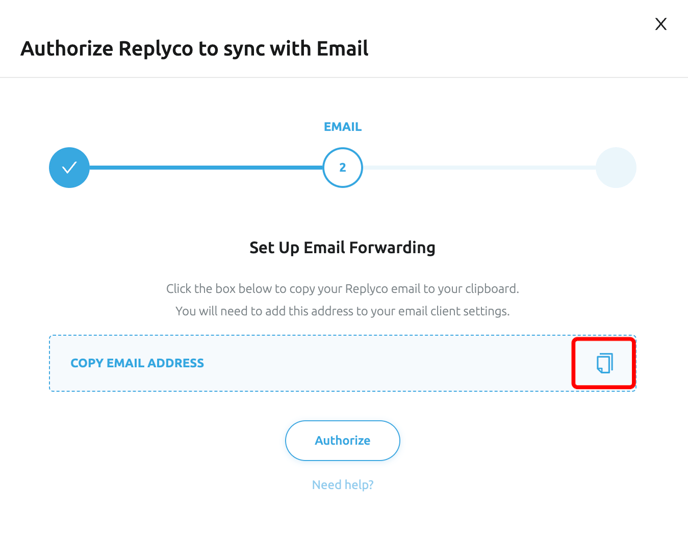
After obtaining your Replyco-generated email address, it is essential to configure a forwarding rule in your original mailbox. This step ensures that all relevant correspondence is directed to the Replyco generic email address, allowing for streamlined communication management.
For your reference, here is a step-by-step guide on how to set up a forwarding rule in Gmail.
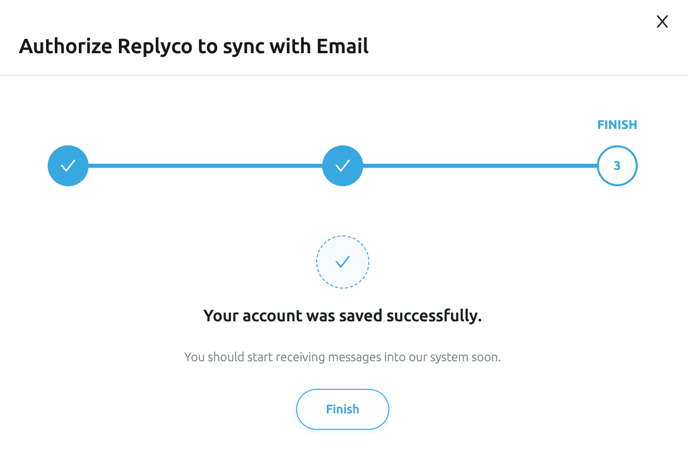
After establishing the forwarding rule, please click the Authorize button to proceed. In the subsequent window, simply select Finish to complete the integration process.
Integrating Your Mailbox via Custom Settings
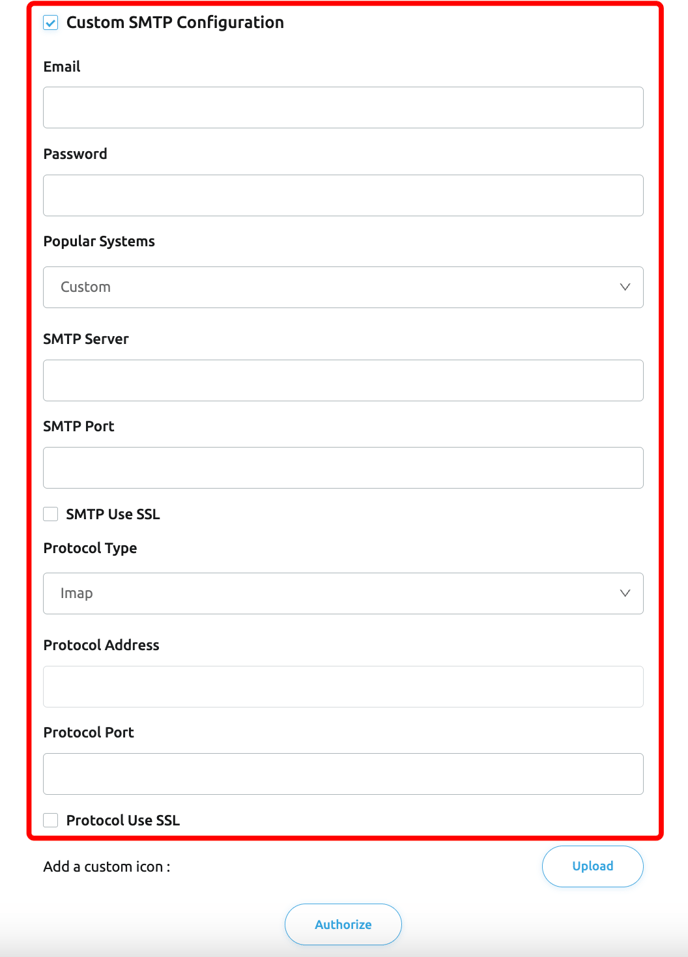
Once you have filled out all the required fields, make sure to check the box for Custom SMTP Configuration and input your email server details to establish the connection.
Please ensure accuracy when entering the details, as even small errors can affect the integration process.
- If you are not sure what details should be used - please contact your mailbox administrator.
- If you are the mailbox administrator - please visit your email system's help/guide portal.
- If you are still struggling with finding proper details - do not hesitate to contact us using the details at the end of this article.
It is important to be aware that Outlook no longer supports POP, IMAP, and SMTP protocols. Therefore, we recommend utilising the Outlook Native integration or setting up your mailbox through the forwarding method for optimal functionality.
Once you have entered all required details and credentials, click the Authorize button to continue. In the window that appears next, select Finish to finalize the integration process.
All Done!
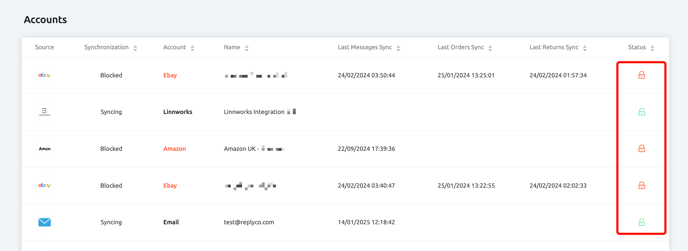
How to Verify the Integrated Channel Functionality:
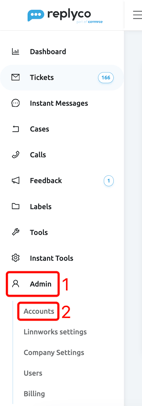
To view the integrations that have been added, navigate to the Admin(1) section and select Accounts(2) from the menu located on the left side of your screen.
- A
 green lock icon means that the Integration IS working properly.
 - A
 red lock icon means the integration is NOT working properly.
FAQs and Known Issues
Why don't I receive any tickets?
If you have integrated your mailbox using the Forwarding method, we recommend that you carefully review your forwarding rules. Ensure that they are configured to direct all necessary correspondence to the Replyco generic email address. In some cases, you may encounter bounce-back emails that explain the issue, such as restrictions on email forwarding set by your organisation. If you do face such challenges, please consult your mail server administrator for assistance.
If you have integrated your mailbox using Custom Settings and are experiencing difficulties, we recommend reaching out to your mail server administrator for further assistance. Should you feel that the issue lies beyond your control, please don't hesitate to get in touch with our Customer Support Team for help.
I am struggling to connect to my mailbox using Custom Settings.
Possible reasons for connection issues may include the following:
- Incorrect credentials; please verify them carefully to ensure accuracy.
- The selected protocol may not be enabled on your email server; you will need to enable it first.
- Some of the ports you specified might be unavailable; consider trying alternative ports.
- If your email account has two-factor authentication (2FA) enabled, you may need to create an app-specific password to facilitate the connection.
Got more questions?
We're here to help! If you have ANY questions, need help with setup, or just want to chat about customer support (really, we are always up for a good chat), please don't hesitate to reach out via:
Email: help@replyco.com
Chat: Click on the chat icon (lower right of the App or Website)